This post is to showcase a SharePoint 2013 workflow that I deployed globally to document libraries in a Site Collection.
The workflow, that can be run on any document, creates an ‘inwards mail’ process item on a list in the inwards mail site, it then triggers the workflow associated with that item, which manages task assignment around that inwards mail process.
This workflow can be utilised for any process, but for my case it is to handle Inwards Mail in a central location.
For more detail on REST, Dictionaries, and Fiddler that is not covered in this post, check out the resources at the bottom of this post.
The outline of this post:
- Setup
- Using REST to look up the current item and set variables
- Using REST to create a list item on a centralised site
- Using REST trigger the list workflow on the new item which exists on another site
- Complete Workflow for reference
- Deploying the workflow globally
1. Setup
I set my workflow to only work for a Custom Content Type named ‘RDC_Scanned_or_Physical’. The reason for this is that Content Types have fields we know will be available when setting variables in the workflow. Alternatively, I could have used ‘Initiation Form Parameters’ that ask the end-user for input when triggering the workflow.
 |
| Figure1: shows the if statement surrounding the workflow logic that checks the CT. |
2. Using REST to look up the current item and set variables
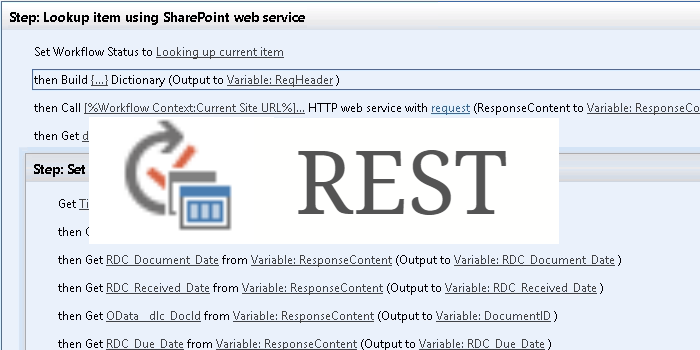
To grab the metadata from the item the workflow is run against we can run an ‘HTTP web service’ call utilising REST. Note: if you have used parameters to capture input, then you may not need to retrieve content from the current item.
| Figure2: Overview of the lookup stage. |
Build dictionary
| Figure3: Build Request Header |
Add the two dictionary items ‘accept’ and ‘content-type’ both with value ‘application/json;odata=verbose’
Output to Variable: ReqHeader of type Dictionary.
Call HTTP Web Service
Set the HTTP method to ‘Get’
Enter the below string to lookup current item:
| Figure4: HTTP Get request. |
| Figure5: Set web service properties |
Get an Item from a Dictionary
| Figure6: Some variables that I set |
After you set your variables, you may want to log them to the workflow history list for debugging.
3. Using REST to create a list item on a centralised site
This process includes setting some Dictionary items and then calling an ‘HTTP post web service’.
This post method can be replicated using Fiddler for testing purposes.
| Figure7: Overview of the create item stage |
Build Dictionaries
The first Dictionary in the screen capture above is for the request header of the web service call. This is set up the same as that above, in fact, you could just use the previous variable ‘ReqHeader’ instead of defining a new one.
The second dictionary is to define the ‘__Metadata type’ on the list you will be creating an item in.
This is specific to your list.
Generally, the metadata type is the same as the list name, however, we can confirm this in Fiddler.
To get my list titled ‘Inwards Mail Process’ on the Site ‘Scanned Mail’
http://SiteCollection/site/Scanned-Mail/_api/web/lists/GetByTitle(‘Inwards%20Mail%20Process’)/items
| Figure8: GET request in Fiddler with Request Headers. Composer Tab |
| Figure9: Select the 200 Success Result |
| Figure10: Fiddler JSON screen on Inspectors tab |
On figure 10 you can see the metadata type that is required for your list when creating an item.
use this when defining your metadata dictionary.
| Figure11: Build dictionary output to variable Metadata of type dictionary |
The last dictionary required is your request parameters which are the columns you can set on your new list item. This will also include your metadata dictionary which must be named __metadata (two underscores)
| Figure12: Parameters dictionary, including column names set by the variables I captured in step 1 |
Post HTTP web service
| Figure13: Set method to post |
Properties as below, make sure that you set RequestContent to that of your parameters dictionary.
| Figure14: Set web service properties |
4. Using REST to trigger the list workflow on the new item
If the list that the item was created on has a workflow associated, the workflow will not trigger on item creation.
This is by design as Microsoft are preventing workflow recursion.
If we want the associated workflow to trigger, we can do so through another web service call.
For this process, we will need the new item ID and the Subscription ID of the associated workflow.
Getting the item ID in our case is a bit hard as we had just created the item through a web service and did not receive an item ID in response.
What I decided to do was when defining the Parameter Dictionary on the previous step I included the Document ID as a unique identifier to target on the new item, You could just as easily set a new column on the list that has a default value to ‘no’ that when the workflow has run it is set to ‘yes’ so you can target the item that has not had a workflow run on it yet. Up to you. If you figure out a way to target the actual ID please let me know.
| Figure15: Overview of the trigger workflow logic. |
You may notice in Figure15 that I have some email fix logic, I will discuss this part later.
Get New Item ID
To target the new item by DocID my HTTP Web Service is like this:
| Figure16: REST call to find the new item by Doc ID. |
| Figure17: Get ID from ResponseContent |
Get Subscription ID
To get the Subscription ID of the workflow on the new item, go to the list in SharePoint and on an item, click the context menu, select ‘Workflows’.
On the ‘Start a New Workflows’ page, right click on the appropriate workflow and select properties to find the address of the URL.
| Figure18: Subscription ID highlighted in yellow |
To grab the subscription ID through workflow check out this post
Starting a workflow through REST
Now that we have the New Item ID and the Subscription ID of the workflow associated we can trigger the associated workflow.
Add an HTTP web service call of type Post with the following strring.
| Figure19: Start Workflow Using REST (POST) |
Again using the same ReqHeader in the properties.
Dont forget to log variables and results to the history list to help debug issues, also note that I have noticed when calling the REST calls that it’s best to keep the URL case sensitive.
Email Fix
My Email Fix in Figure15 is specific to my situation. I noticed that when rinning the associated workflow on the new item, emails would fail as the workflow could not resolve the username.
Modifying the item, as simple as changing the title to something else, resolved the issue.
So my email fix step is calling another associated workflow on the new list item that updates the title name, pauses for a minute then starts the inwards mail workflow.
5. Complete Workflow for reference
6. Deploying the workflow globally
By default you cannot deploy a SharePoint 2013 useable workflow globally through SharePoint Designer.
It is however, possible through PowerShell and I have blogged about it on these two posts:
- Publish SharePoint 2013 Workflow Globally
- Associate your 2013 workflow to every library/list through PowerShell
That concludes this post on showcasing the 2013 global reusable workflow I created and deployed.
Hopefully parts of this helps some readers, if it does or if you have any questions, comment below.
Dan.

